

Hello everyone,
As promised, I will begin now the complete electroplating guide to help you to restore as better as possible your Alfa. Details make the difference !
I've replate now many parts of my Spider, and rather satisfied of the results.
I hope you'll be interested by the thread, and you'll be soon able to do the work without too much difficulties.
Introduction
I'm going to guide you through all the stages of plating, from setting up the tank and his chemicals and components used. The differents steps are the preparation of the electroplating bath, an explanation of the electrical needs, the preparation (degreasing and cleaning) of the items to be plated.
Why Zinc electroplating and not Nickel, Gold, Chrome or others ? First, because the Zinc plated parts are the most used in our Alfa's; there are only some chromes, many of the "chrome" parts are stainless stain made.
Next, Zinc is one of the most easy metals to plate; it gives a very good protection against the corrosion and, if applied correctly, can gives an outstanding finish, almost as shiny as chromium. You will not need hard dangerous and corrosive chemicals like industry uses (cyanide salts).
On the other hand, you will save money, many parts good for the trash will revive. You'll be proud of the result if you follow all the steps.
Tips will be in green
What will we need to electroplate ?
- the chemicals to make your electrolyte bath
- the chemicals to chromate
- some zinc to make the anode
- tanks
- electric copper wire
- a good power supply
- accessories like gloves and protection glasses
The Chemicals for the electrolyte baths :
- distilled water (5 litres > 1.32 gal), it's enough to begin.
- Ammonium Choride (hardware shop or Ebay) : 2 kilos (about 4.5 pounds)
- Zinc choride (same) : 1 kilo (about 2.25 pounds)
- Zylite 290 makeup Electrolyte chemicals and passivates : 4 x 250 mL
- Zylite 290 maintenance solution (200 mL)
The complete kit is avaible at gateros plating but it's not the best way to save money, you must add the expensive shipping, chemicals are in lower quantities, and some items not necessary.
Explanations of the quantities :
The electrolyte bath as a limited life contrary to the sellers say. The bath will be contaminated by hard metal deposits or other pollution and will go bad.
The quantities I advice are calculated to electroplate all the rusted items of a car restoration, and at lowest cost as possible.
With 2 kilos of Ammonium Chloride, 1 kg of Zinc Chloride, and the 50 cL of Zylite make-up, you'll can renew the complete bath five times, and that's enough for all the car. You can buy in lower quantities, but it will costs a little more.
So, for a tank of 4.5 litres, you will use : 4 litres of distilled water, 200 gr of Zinc Chloride, 400 gr of Ammonium Chloride and 200 mL of Zylite 290 make up. I will talk about the Zylite Maintenance later.
Total price I paid for five electrolyte baths : 100 USD
- distilled water (20 litres) : 5 USD
- Zinc Chloride (1 kg) : 40 USD (Ebay)
- Ammonium Chloride (2 kgs) : about 25 USD (hardware shop)
- Zylite Make-up (1 L) : 20 USD
- Zylite Maintenance (200 mL) : 10 USD
The chemicals for the passivate baths (chromate):
The passivate baths are avaible is several colours : white/blue, yellow/gold, olive, and black. You'll need only the white/blue and yellow/gold passivate.
It's necessary to passivate, to improve the protection against the corrosion. You can only white/blue passivate to restore some originally chromed parts, and the result will be a shiny silver colour, like chrome. But for the nuts, bolts, brackets,... it's better to yellow/gold passivate : why ? first, to keep the original look of the parts, and also to improve the protection against the corrosion. If you yellow/gold passivate, you must first white/blue passivate, if you do not, the yellow chromate will go away !
You'll need :
- white/gold passivate : about 15 USD
- yellow/gold passivate : about 15 USD
- distilled water (10 litres)
The passivate are sold in little bottles of 200 mL, and that's enough for the whole car. They will be mixed with distilled water in two plastic tanks (about 100 mL for 5 litres).
The Anodes :
You'll need zinc to make the anodes. It must be as good as possible, mine is 99,95 % pure.
I recommand to install at least two anodes, positionned at 180°.
The zinc sold by Gateros plating is very good but very expensive. Try to find it in a "metal shop" or a plumber.
When it is new, it's shining. Don't buy oxyded zinc !
You'll need, for a tank of 5 liters, two anodes or about 3 x 6 inches.
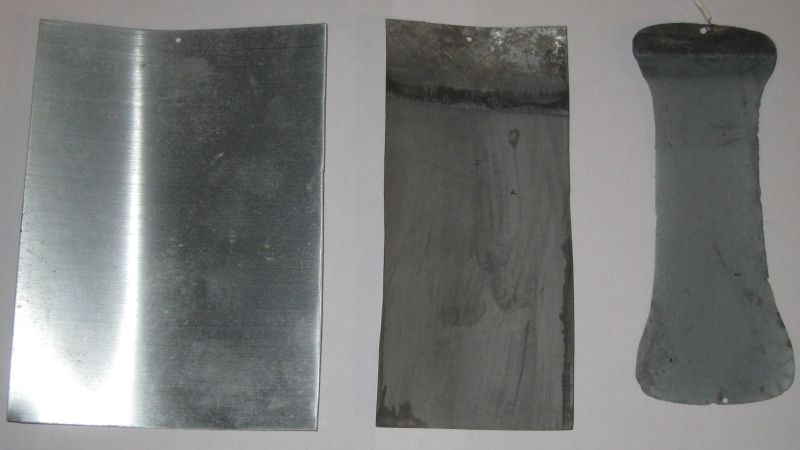
Here's a picture : the first is a new anode, the second an anode used two or three times, the third an anode used fifty times. You can see it melts ! but it's always good. The only condition : the area of the anodes must be equal or larger than the item to be plated.
The anodes sold have a small hole in the top, to attach the Cu wire. However, it's better to solder the wire to the anode if you have a little soldering iron.
The tanks :
You'll need, to work at ease, three plastic tanks (4-5 liters) with a cover to avoid some contamination of the electrolyse and safety when you don't use them.
The first will contain the electrolyte bath, the second, the clear/blue passivate, the third, the yellow/gold passivate.
You'll need too a 10 litres bucket filled with water to rinse the items you've plated before immersing them into the passivate baths.
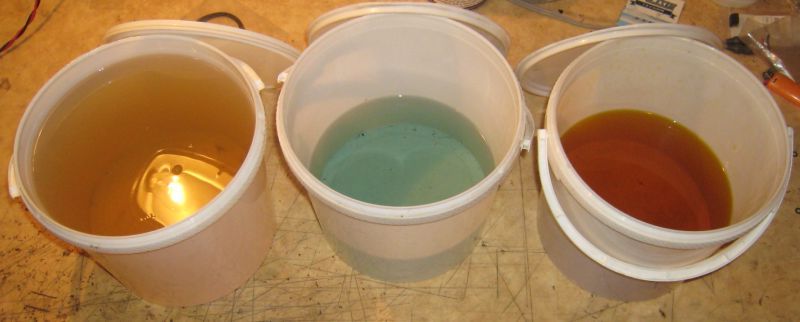
Here's a picture of the plastic tanks containing the electrolyte bath (left), clear/blue passivate (middle), and yellow passivate.
The diameter of the tanks is about 8", and the height 8.5"
The copper wires
You need two sets of wires, the first to connect the power supply to the anode and the item to be plated,
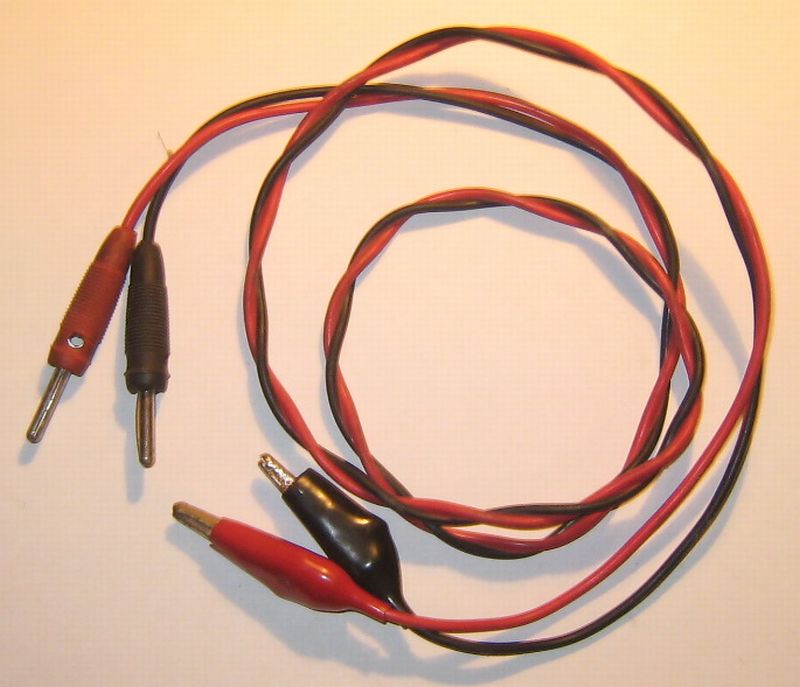
and the second to hang the items into the electrolyte bath.
When you buy a kit, you only get the thin copper wire, to hang the items.
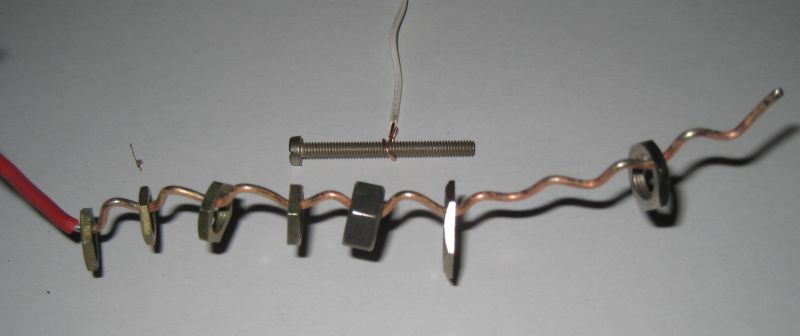
I recommand to get some big electric wire, to plate easily many bolts at the same time - imagine to have one wire for one nut ! The wire must be thick enough to support the weight of the nuts. But look at the picture to understand :
The power supply
Electroplating needs a DC current source.
First, I'm going to try to explain you what's is happening in relation of the voltage and the current.
- The voltage : it's easy, don't look at it ! The current depends of the voltage, and here, only the current is to be considered. (the voltage between the anode and the item is often below 1 DCV)
- The current : here we are ! It's one of the most important things to get right.
I can tell you what amperage is ideal, but it depends on the size of the items beeing plated (and to a lesser degree the temperature of the electrolyte).
There's no ideal voltage, but there's an ideal current. I tried many possibilities, and I found that the ideal current is 100 mA per100cm², or 65 mA per square inch.
If you don't take care of the ideal current, you can't get two problems :
- if the current is too low, the plating will take too long time and get dark and/or dull areas
- if the current is too high, the plating is too fast, and the zinc deposit is rough and grey with dark patches in the most high current density areas
- if the current is very too high you could burn the electrolyte and/or the make-up
----> so, the best way is always to set the power supply controls (voltage and/or intensity) at the minimum on starting.
The best power supply is powerfull, with both controls of the voltage and the intensity. You can adjust the voltage and the current but like I said before, only adjust the voltage, and by the same way the current will vary because I=U/R.
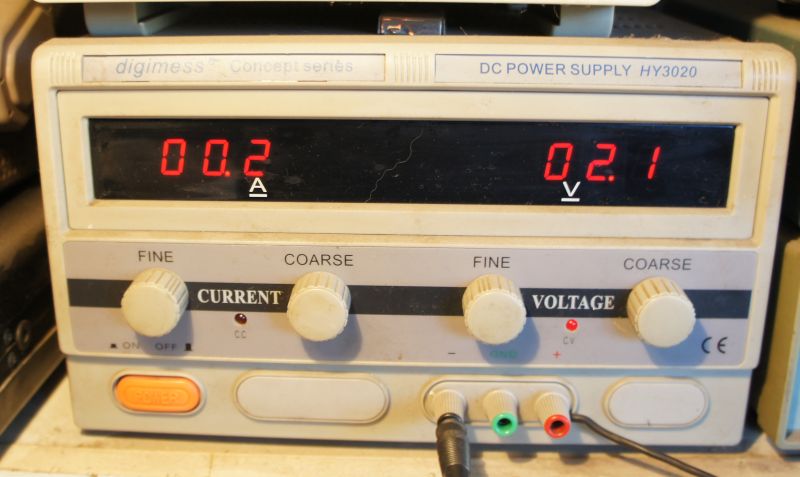
Here's a picture of mine : 0-30 Vots, 0 - 20 amp :
If you don't possess such a power supply, you may use a car or a car battery charger. You have to buy one big variable resistor (at least 20 - 30 watts) of 50 - 100 ohms. You'll need too a Ampere meter to know how much current is running.
On this little drawing, you can easily see how to make the connexions :

When you begin electroplating, always measure the area of the item beeing plated.Question ? do you know the surface of the front bolt of the rear trailing arm ?
I don't know too. So, let's measure approximatively. (there are some sofwares to calculate)
- The surface of the cylinder is : 2 * Π * A 2 + 2 * Π * A * B = 38 cm²
- The surface of the head is : 6 x (1.2 x 0.6) = 4,32 cm²
Total is 42 cm² or 6,5 square/inches. Did you think it was so large ?
The current needed to plate this bolt is then : 6,5 x 65 (mA)= 420 mA or 0,42 A
I did it and here it is :
Accessories :
- The tank filter : some advocate to attach filter in the bottom of the tank. I tried it , and didn't get any advantage. I prefer to filter the electrolyte every five uses. The best to do it is to buy some paint filter sold in the auto paint shops. I paid mine about 3 USD for ten filters. The coffee filters block up too quickly.
- The air pump : absolutely necessary : when the part is plating, many little bubbles of hydrogen are produced; the agitation pump will chase them away from the surface of the item. With no pump, some areas could be badly plated
- The air stone : if you have one, ok, but not essential. I tried then removed it, I did'nt seen any difference.
- The gloves : it's a good idea to wear gloves, because the electrolytic is a acid mixture. But take care, many new gloves are filled with silicone and if it goes to the item, you'll got areas badly plated too. So, wear the gloves, and wash your hands with a good detergent.
- The goggles : good idea too, your eyes will not appreciate some acid projection.
- The protection mask : better to have one, but not critical for plating some screws. You will not have big fumes.
- The tank heater : if you plate outside in the snow, perhaps. If not, forget them; if the temperature of the bath is too hot, the shining will decrease...
- The PH paper : In theory, the PH balance can alter over a period of time. The PH paper can check the balnce, witch must be about 5.5 - 6. If the PH is too high, some HcL can lower it, and if the PH is too low, Potassium Hydroxyde can raise it. But normally, the PH doesn't need adjusting. I tested my electrolyte after many many uses, and never had to adjust it. So, forget it too.
Cleaning the parts before plating
One of the key factors in good plating is a good preparation, and a good preparation means a perfect cleaning.
1) Degrease perfectly the parts, to remove thick oil and grease. You can use soak, acetone, tix, and s.o.
2) Remove rust or other oxides, the easiest way is to sand them, you can too use grip paper.
If you sand, sometimes, some little pits of rust can stay, they will go on the step 4)
3) Follow with a dip in caustic soda, for a good cleaning
4) Final cleaning : dip in hydrochloric acid for 1 or 2 minutes. It should be used in a concentration of 20 % (80 % of water). Caution : always add acid to water, and never the other way round.
After every step 1 to 4, rinse in clear water.
Remember, after this, don't touch parts by hands, and don't let them exposed to the air or they will go rusty very quickly.
To be sure the part is perfectly cleaned, you can use the "water brake test". Just dip the part in clean water, if the water beads then there are still traces of oil, grease, or solvent left on it; if the water makes a "film" over the item, then it's free from any oil, grease, etc...
-----------------------------------------------------
And now, the step by step procedure !
I suppose you've read everything before, and all you need is on your bench :
- a bucket with the electroplating mixture
- a bucket with the blue passivate chemical
- a bucket with the yellow/gold passivate chemical
- a bucket with clear water
- two electrodes of pure zinc
- a power supply
- some electrical wires
- a timer
- a fish pump
- gloves, absorbing paper, googles, etc
Now, go to your garage and choose the part you want to plate.
You need as I told before, to prepare it very well, if you do not, the
plating will not work !
The very best way to have you part perfectly clean is to sandblast it. That's
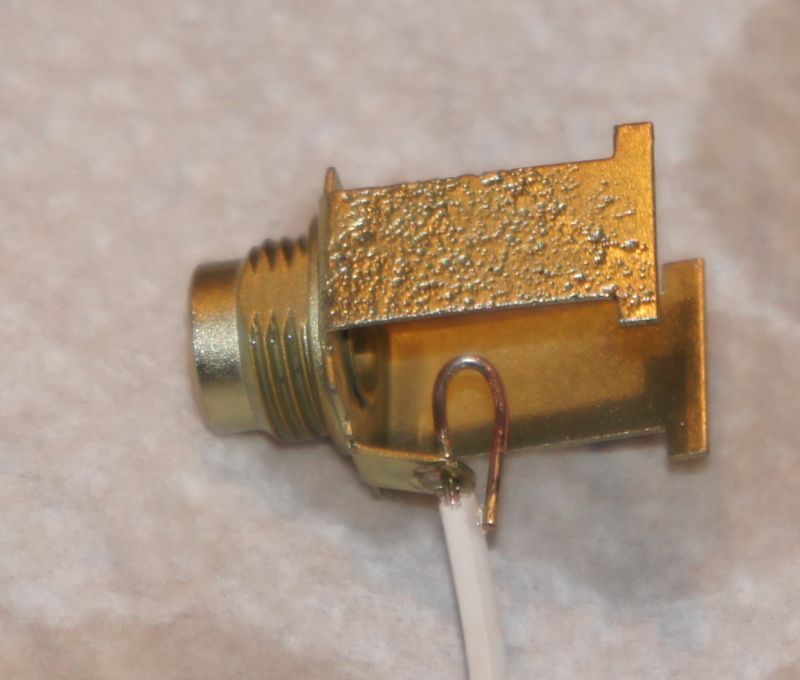
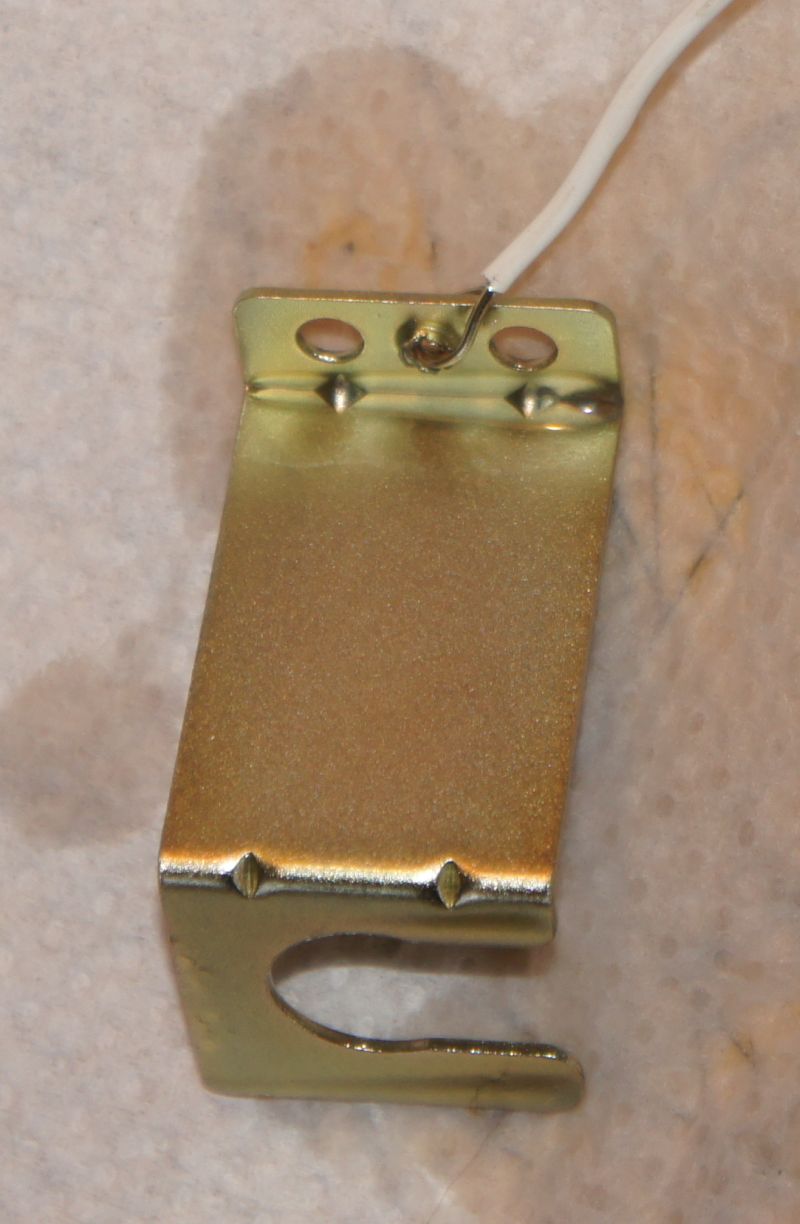
I've just done now, I had two parts to restore, a jack socket and an bracket,
coming from a Vintage amplifier Sansui. Some tell to degrease the part, using
a degreaser to remove thick oil an grease, but if you sandblast it's not necessary.
When you will have finish to sandblast it, run quickly to you workbench with it
because it begins to rust again !
Some tell too to submerse the part in caustic soda, but, again, if you sandblasted
the part correctly, you may avoid this step. More than that, I tried two or three
times to pickle in a mixture of HCl, then rinse very well, but some acid always stays
on the part and pollutes the electroplating bath, so I avoid to do that now.
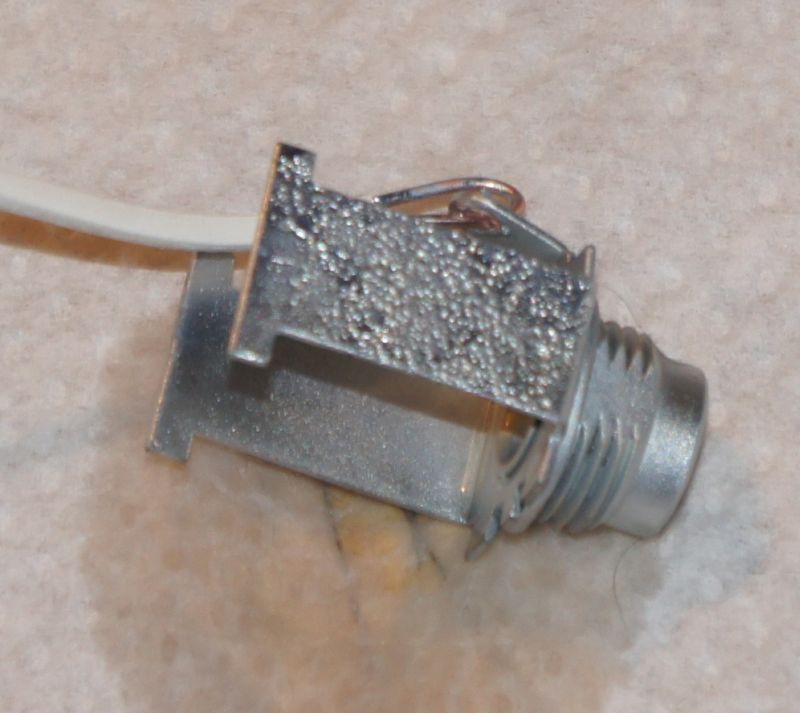
So, I'm here now with my littles parts, just sandblasted, and ready to be plated :
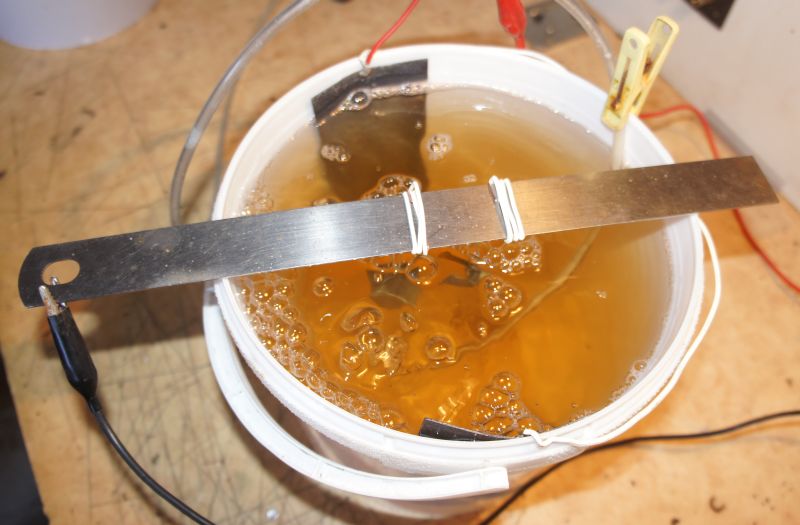
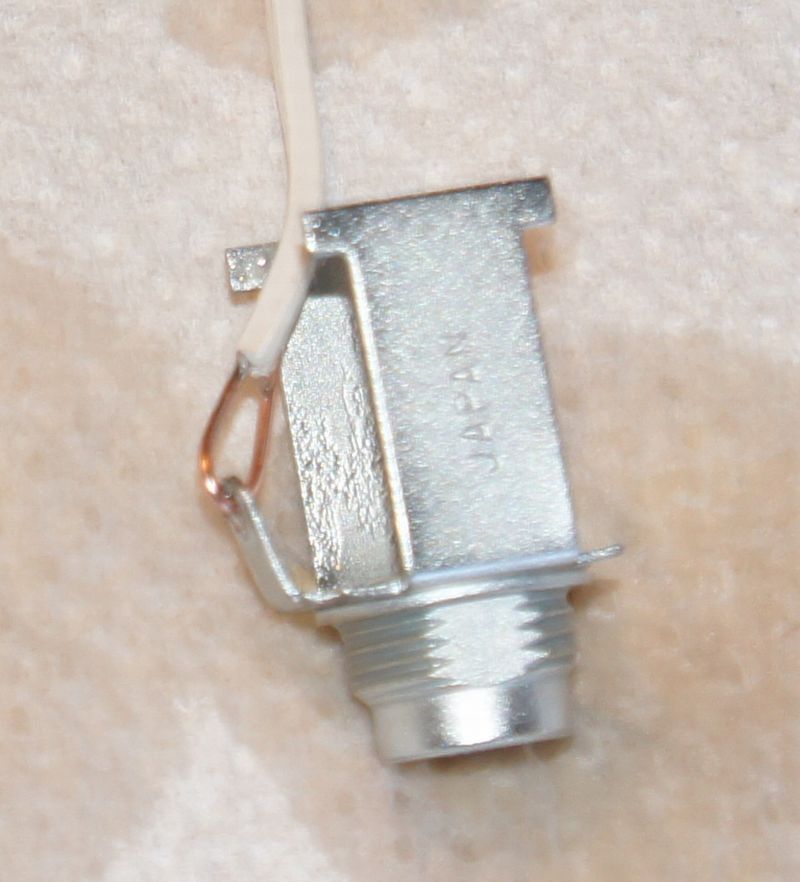
1/ As you can see on the picture, attach the part(s) with cooper wire
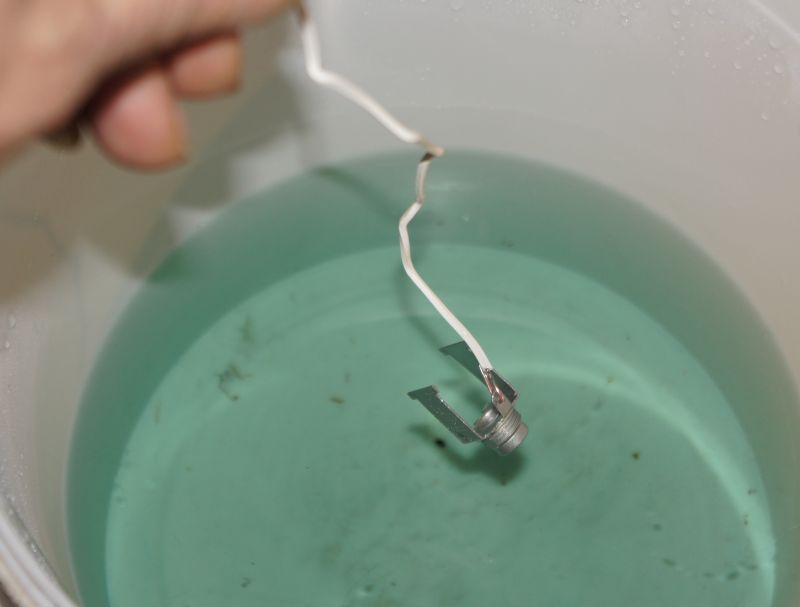
2/ hang the zinc electrodes into the electroplating bath with the wires, and link them
together to have a good electrical connexion (I solder mine) :
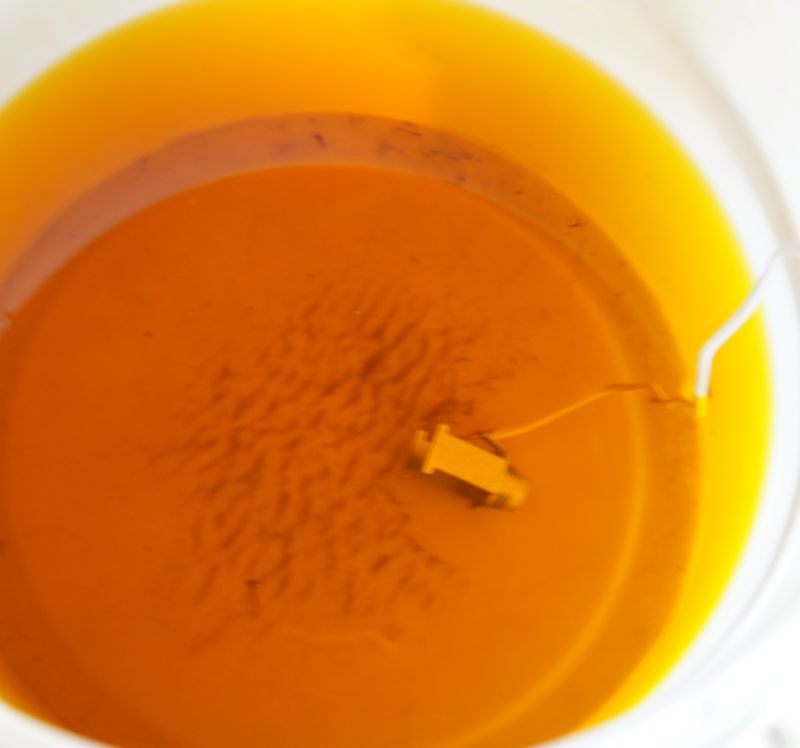
3/ connect the zinc anodes to the power supply (for these two little parts, you can see the intensity of the current I use), the positive to the zinc, the negative to the part that is to be plated. Begin with the smallest current, and increase it to the intensity required by the surface of the parts.
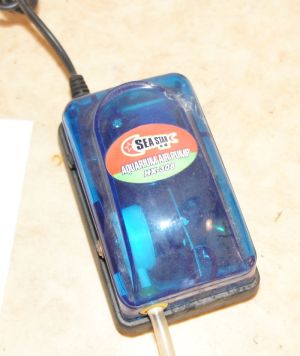
4/ Connect your little fishpump (it will improve the plating)
5/ If you everything is right, it will look like this :
6/ Every five minutes, you can change the position of the part, to improve the plating; you may also find plating is brighter if the part is near the surface of the electrolyte. Look at the part, if the current is too high the process will be quick and the zinc deposit may be rought and black, and if the current is too low, the process will be slow and the deposit can be again dull will not adhere properly to the steel.
The longer you leave the part in the electrolyte, the thicker the zinc deposit will be.
For a good plating, I leaved my little parts for fifty minutes.
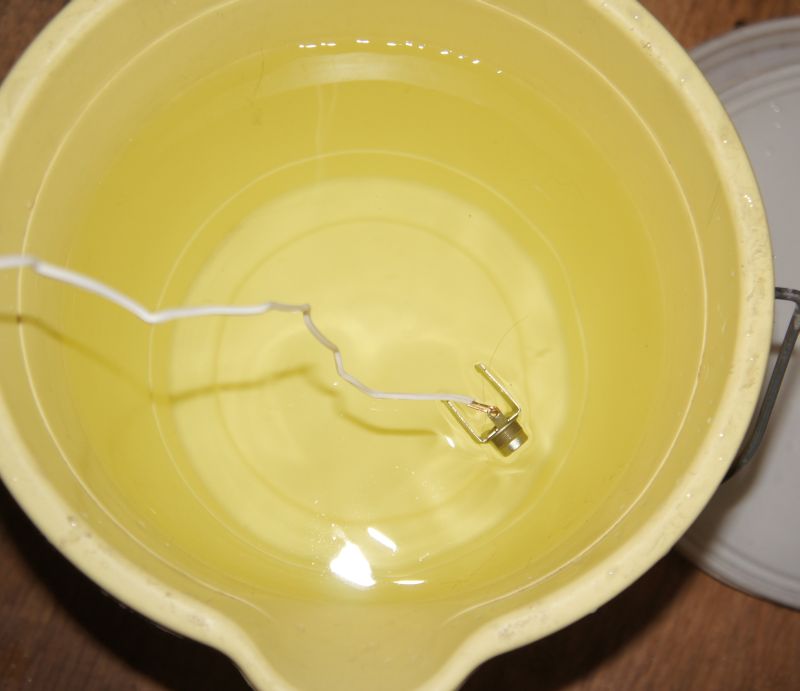
7/ It time now to clear/blue passivate the parts : rince the part in the bucket of water :
You can see how the jack socket looks :
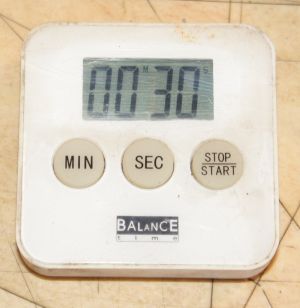
set your timer for 30 seconds,
then immediately immerse the part in the clear/blue passivate
after 30 seconds, remove the part and rinse it again - you can see on the following picture how looks the jack socket :
8/ Rinse again in the water the part, and go into the yellow passivate,
from 45 seconds if you want a light yellow color, to 75 seconds if
you want a more coloured appearance. I let my socket for 60 seconds.
Rince again the part and allow to dry for 24 hours. Your can also use a hot air gun,
but you will remark that the colour will go to dark. I don't like to use this way.
Here are my finished parts, ready to go to the Sansui !
(you can see how was the jack socket rusted !!!)
If you have still any question or remark, you can send me an email !
As promised, I will begin now the complete electroplating guide to help you to restore as better as possible your Alfa. Details make the difference !
I've replate now many parts of my Spider, and rather satisfied of the results.
I hope you'll be interested by the thread, and you'll be soon able to do the work without too much difficulties.
Introduction
I'm going to guide you through all the stages of plating, from setting up the tank and his chemicals and components used. The differents steps are the preparation of the electroplating bath, an explanation of the electrical needs, the preparation (degreasing and cleaning) of the items to be plated.
Why Zinc electroplating and not Nickel, Gold, Chrome or others ? First, because the Zinc plated parts are the most used in our Alfa's; there are only some chromes, many of the "chrome" parts are stainless stain made.
Next, Zinc is one of the most easy metals to plate; it gives a very good protection against the corrosion and, if applied correctly, can gives an outstanding finish, almost as shiny as chromium. You will not need hard dangerous and corrosive chemicals like industry uses (cyanide salts).
On the other hand, you will save money, many parts good for the trash will revive. You'll be proud of the result if you follow all the steps.
Tips will be in green
What will we need to electroplate ?
- the chemicals to make your electrolyte bath
- the chemicals to chromate
- some zinc to make the anode
- tanks
- electric copper wire
- a good power supply
- accessories like gloves and protection glasses
The Chemicals for the electrolyte baths :
- distilled water (5 litres > 1.32 gal), it's enough to begin.
- Ammonium Choride (hardware shop or Ebay) : 2 kilos (about 4.5 pounds)
- Zinc choride (same) : 1 kilo (about 2.25 pounds)
- Zylite 290 makeup Electrolyte chemicals and passivates : 4 x 250 mL
- Zylite 290 maintenance solution (200 mL)
The complete kit is avaible at gateros plating but it's not the best way to save money, you must add the expensive shipping, chemicals are in lower quantities, and some items not necessary.
Explanations of the quantities :
The electrolyte bath as a limited life contrary to the sellers say. The bath will be contaminated by hard metal deposits or other pollution and will go bad.
The quantities I advice are calculated to electroplate all the rusted items of a car restoration, and at lowest cost as possible.
With 2 kilos of Ammonium Chloride, 1 kg of Zinc Chloride, and the 50 cL of Zylite make-up, you'll can renew the complete bath five times, and that's enough for all the car. You can buy in lower quantities, but it will costs a little more.
So, for a tank of 4.5 litres, you will use : 4 litres of distilled water, 200 gr of Zinc Chloride, 400 gr of Ammonium Chloride and 200 mL of Zylite 290 make up. I will talk about the Zylite Maintenance later.
Total price I paid for five electrolyte baths : 100 USD
- distilled water (20 litres) : 5 USD
- Zinc Chloride (1 kg) : 40 USD (Ebay)
- Ammonium Chloride (2 kgs) : about 25 USD (hardware shop)
- Zylite Make-up (1 L) : 20 USD
- Zylite Maintenance (200 mL) : 10 USD
The chemicals for the passivate baths (chromate):
The passivate baths are avaible is several colours : white/blue, yellow/gold, olive, and black. You'll need only the white/blue and yellow/gold passivate.
It's necessary to passivate, to improve the protection against the corrosion. You can only white/blue passivate to restore some originally chromed parts, and the result will be a shiny silver colour, like chrome. But for the nuts, bolts, brackets,... it's better to yellow/gold passivate : why ? first, to keep the original look of the parts, and also to improve the protection against the corrosion. If you yellow/gold passivate, you must first white/blue passivate, if you do not, the yellow chromate will go away !
You'll need :
- white/gold passivate : about 15 USD
- yellow/gold passivate : about 15 USD
- distilled water (10 litres)
The passivate are sold in little bottles of 200 mL, and that's enough for the whole car. They will be mixed with distilled water in two plastic tanks (about 100 mL for 5 litres).
The Anodes :
You'll need zinc to make the anodes. It must be as good as possible, mine is 99,95 % pure.
I recommand to install at least two anodes, positionned at 180°.
The zinc sold by Gateros plating is very good but very expensive. Try to find it in a "metal shop" or a plumber.
When it is new, it's shining. Don't buy oxyded zinc !
You'll need, for a tank of 5 liters, two anodes or about 3 x 6 inches.
Here's a picture : the first is a new anode, the second an anode used two or three times, the third an anode used fifty times. You can see it melts ! but it's always good. The only condition : the area of the anodes must be equal or larger than the item to be plated.
The anodes sold have a small hole in the top, to attach the Cu wire. However, it's better to solder the wire to the anode if you have a little soldering iron.
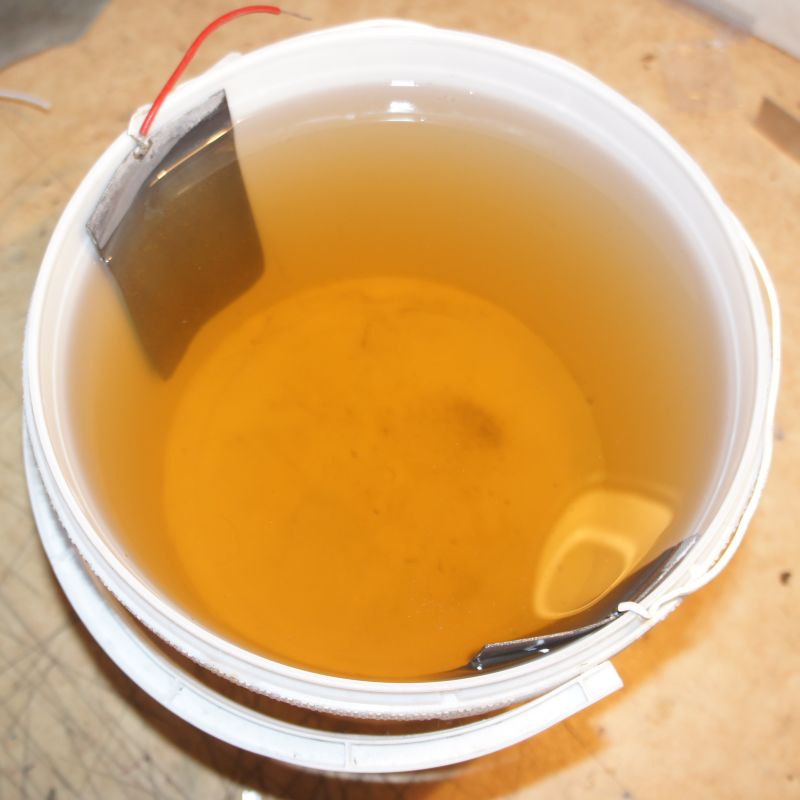
The tanks :
You'll need, to work at ease, three plastic tanks (4-5 liters) with a cover to avoid some contamination of the electrolyse and safety when you don't use them.
The first will contain the electrolyte bath, the second, the clear/blue passivate, the third, the yellow/gold passivate.
You'll need too a 10 litres bucket filled with water to rinse the items you've plated before immersing them into the passivate baths.
Here's a picture of the plastic tanks containing the electrolyte bath (left), clear/blue passivate (middle), and yellow passivate.
The diameter of the tanks is about 8", and the height 8.5"
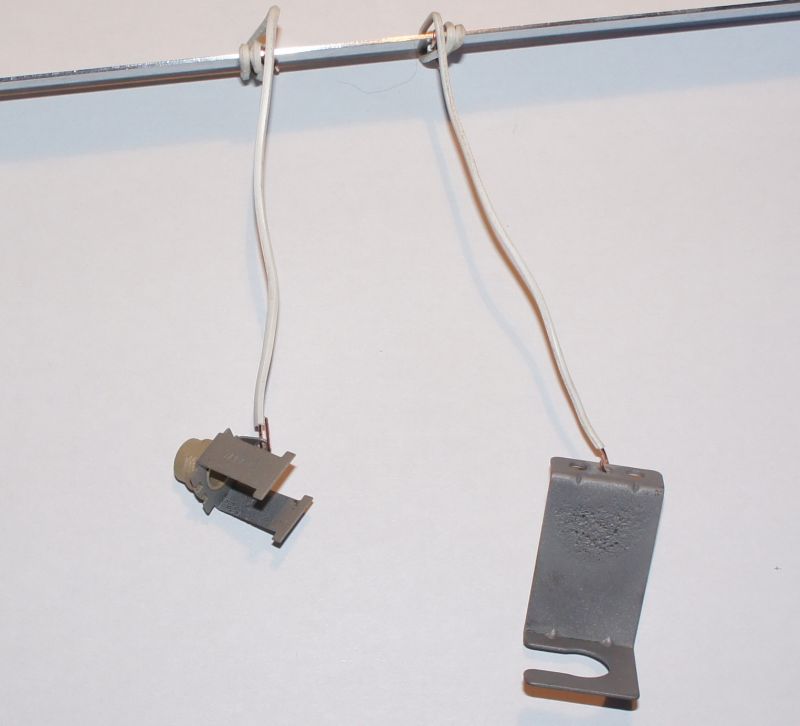
The copper wires
You need two sets of wires, the first to connect the power supply to the anode and the item to be plated,
and the second to hang the items into the electrolyte bath.
When you buy a kit, you only get the thin copper wire, to hang the items.
I recommand to get some big electric wire, to plate easily many bolts at the same time - imagine to have one wire for one nut ! The wire must be thick enough to support the weight of the nuts. But look at the picture to understand :
The power supply
Electroplating needs a DC current source.
First, I'm going to try to explain you what's is happening in relation of the voltage and the current.
- The voltage : it's easy, don't look at it ! The current depends of the voltage, and here, only the current is to be considered. (the voltage between the anode and the item is often below 1 DCV)
- The current : here we are ! It's one of the most important things to get right.
I can tell you what amperage is ideal, but it depends on the size of the items beeing plated (and to a lesser degree the temperature of the electrolyte).
There's no ideal voltage, but there's an ideal current. I tried many possibilities, and I found that the ideal current is 100 mA per100cm², or 65 mA per square inch.
If you don't take care of the ideal current, you can't get two problems :
- if the current is too low, the plating will take too long time and get dark and/or dull areas
- if the current is too high, the plating is too fast, and the zinc deposit is rough and grey with dark patches in the most high current density areas
- if the current is very too high you could burn the electrolyte and/or the make-up
----> so, the best way is always to set the power supply controls (voltage and/or intensity) at the minimum on starting.
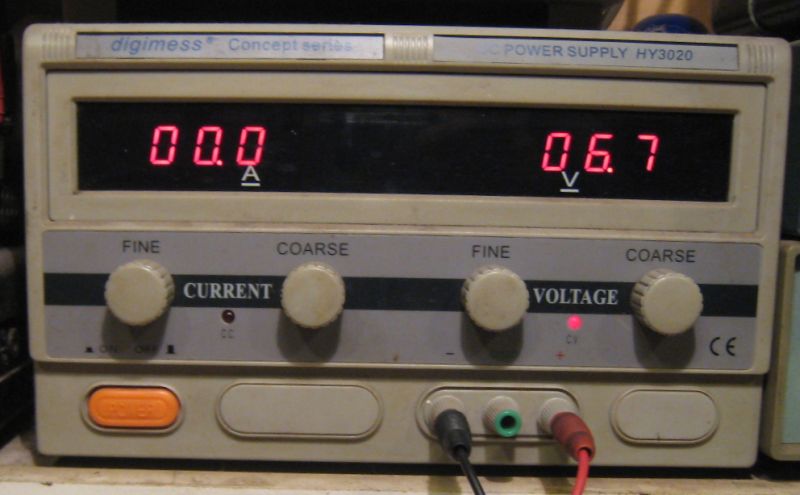
The best power supply is powerfull, with both controls of the voltage and the intensity. You can adjust the voltage and the current but like I said before, only adjust the voltage, and by the same way the current will vary because I=U/R.
Here's a picture of mine : 0-30 Vots, 0 - 20 amp :
If you don't possess such a power supply, you may use a car or a car battery charger. You have to buy one big variable resistor (at least 20 - 30 watts) of 50 - 100 ohms. You'll need too a Ampere meter to know how much current is running.
On this little drawing, you can easily see how to make the connexions :
When you begin electroplating, always measure the area of the item beeing plated.Question ? do you know the surface of the front bolt of the rear trailing arm ?
I don't know too. So, let's measure approximatively. (there are some sofwares to calculate)
- The surface of the cylinder is : 2 * Π * A 2 + 2 * Π * A * B = 38 cm²
- The surface of the head is : 6 x (1.2 x 0.6) = 4,32 cm²
Total is 42 cm² or 6,5 square/inches. Did you think it was so large ?
The current needed to plate this bolt is then : 6,5 x 65 (mA)= 420 mA or 0,42 A
I did it and here it is :
Accessories :
- The tank filter : some advocate to attach filter in the bottom of the tank. I tried it , and didn't get any advantage. I prefer to filter the electrolyte every five uses. The best to do it is to buy some paint filter sold in the auto paint shops. I paid mine about 3 USD for ten filters. The coffee filters block up too quickly.
- The air pump : absolutely necessary : when the part is plating, many little bubbles of hydrogen are produced; the agitation pump will chase them away from the surface of the item. With no pump, some areas could be badly plated
- The air stone : if you have one, ok, but not essential. I tried then removed it, I did'nt seen any difference.
- The gloves : it's a good idea to wear gloves, because the electrolytic is a acid mixture. But take care, many new gloves are filled with silicone and if it goes to the item, you'll got areas badly plated too. So, wear the gloves, and wash your hands with a good detergent.
- The goggles : good idea too, your eyes will not appreciate some acid projection.
- The protection mask : better to have one, but not critical for plating some screws. You will not have big fumes.
- The tank heater : if you plate outside in the snow, perhaps. If not, forget them; if the temperature of the bath is too hot, the shining will decrease...
- The PH paper : In theory, the PH balance can alter over a period of time. The PH paper can check the balnce, witch must be about 5.5 - 6. If the PH is too high, some HcL can lower it, and if the PH is too low, Potassium Hydroxyde can raise it. But normally, the PH doesn't need adjusting. I tested my electrolyte after many many uses, and never had to adjust it. So, forget it too.
Cleaning the parts before plating
One of the key factors in good plating is a good preparation, and a good preparation means a perfect cleaning.
1) Degrease perfectly the parts, to remove thick oil and grease. You can use soak, acetone, tix, and s.o.
2) Remove rust or other oxides, the easiest way is to sand them, you can too use grip paper.
If you sand, sometimes, some little pits of rust can stay, they will go on the step 4)
3) Follow with a dip in caustic soda, for a good cleaning
4) Final cleaning : dip in hydrochloric acid for 1 or 2 minutes. It should be used in a concentration of 20 % (80 % of water). Caution : always add acid to water, and never the other way round.
After every step 1 to 4, rinse in clear water.
Remember, after this, don't touch parts by hands, and don't let them exposed to the air or they will go rusty very quickly.
To be sure the part is perfectly cleaned, you can use the "water brake test". Just dip the part in clean water, if the water beads then there are still traces of oil, grease, or solvent left on it; if the water makes a "film" over the item, then it's free from any oil, grease, etc...
-----------------------------------------------------
And now, the step by step procedure !
I suppose you've read everything before, and all you need is on your bench :
- a bucket with the electroplating mixture
- a bucket with the blue passivate chemical
- a bucket with the yellow/gold passivate chemical
- a bucket with clear water
- two electrodes of pure zinc
- a power supply
- some electrical wires
- a timer
- a fish pump
- gloves, absorbing paper, googles, etc
Now, go to your garage and choose the part you want to plate.
You need as I told before, to prepare it very well, if you do not, the
plating will not work !
The very best way to have you part perfectly clean is to sandblast it. That's
I've just done now, I had two parts to restore, a jack socket and an bracket,
coming from a Vintage amplifier Sansui. Some tell to degrease the part, using
a degreaser to remove thick oil an grease, but if you sandblast it's not necessary.
When you will have finish to sandblast it, run quickly to you workbench with it
because it begins to rust again !
Some tell too to submerse the part in caustic soda, but, again, if you sandblasted
the part correctly, you may avoid this step. More than that, I tried two or three
times to pickle in a mixture of HCl, then rinse very well, but some acid always stays
on the part and pollutes the electroplating bath, so I avoid to do that now.
So, I'm here now with my littles parts, just sandblasted, and ready to be plated :

1/ As you can see on the picture, attach the part(s) with cooper wire
2/ hang the zinc electrodes into the electroplating bath with the wires, and link them
together to have a good electrical connexion (I solder mine) :

3/ connect the zinc anodes to the power supply (for these two little parts, you can see the intensity of the current I use), the positive to the zinc, the negative to the part that is to be plated. Begin with the smallest current, and increase it to the intensity required by the surface of the parts.

4/ Connect your little fishpump (it will improve the plating)

5/ If you everything is right, it will look like this :

6/ Every five minutes, you can change the position of the part, to improve the plating; you may also find plating is brighter if the part is near the surface of the electrolyte. Look at the part, if the current is too high the process will be quick and the zinc deposit may be rought and black, and if the current is too low, the process will be slow and the deposit can be again dull will not adhere properly to the steel.
The longer you leave the part in the electrolyte, the thicker the zinc deposit will be.
For a good plating, I leaved my little parts for fifty minutes.
7/ It time now to clear/blue passivate the parts : rince the part in the bucket of water :

You can see how the jack socket looks :

set your timer for 30 seconds,

then immediately immerse the part in the clear/blue passivate

after 30 seconds, remove the part and rinse it again - you can see on the following picture how looks the jack socket :

8/ Rinse again in the water the part, and go into the yellow passivate,
from 45 seconds if you want a light yellow color, to 75 seconds if
you want a more coloured appearance. I let my socket for 60 seconds.
Rince again the part and allow to dry for 24 hours. Your can also use a hot air gun,
but you will remark that the colour will go to dark. I don't like to use this way.

Here are my finished parts, ready to go to the Sansui !
(you can see how was the jack socket rusted !!!)


If you have still any question or remark, you can send me an email !
 .
.


