I decided that I needed to replace the steering idler arm bushings after finding that when jacked up I could rock the passenger side wheel back and forth when grabbing the tire at the 3 & 9 o'clock positions.
I did not want to remove the ball joints as instructed by the manual, so I took a gamble and did the job like this:
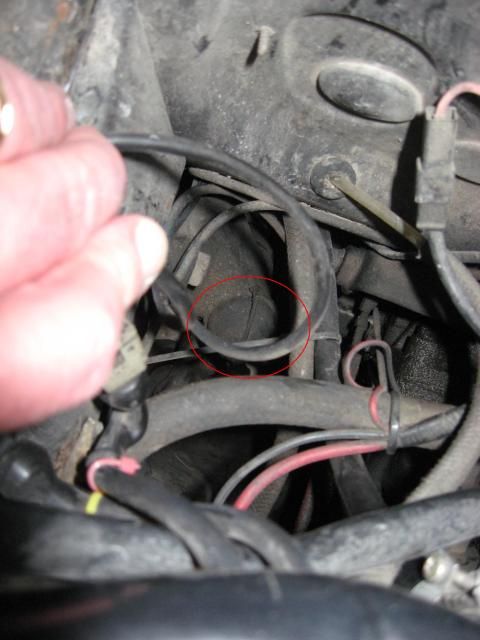
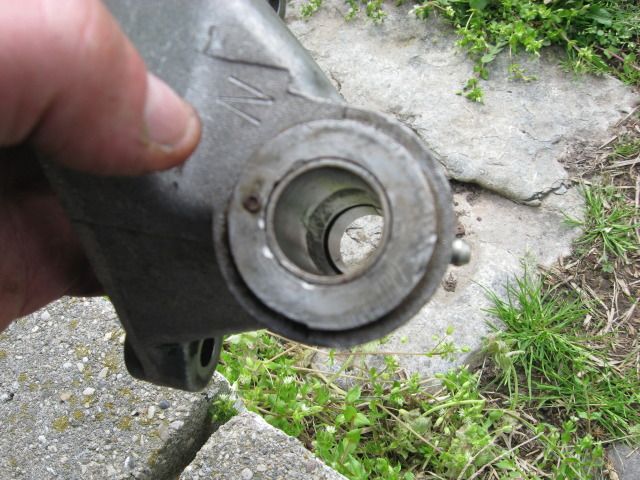
After removing the windshield fluid bottle the top of the idler arm bracket can be seen. It has a cap and a wire clip that holds the cap in place
![Image]()
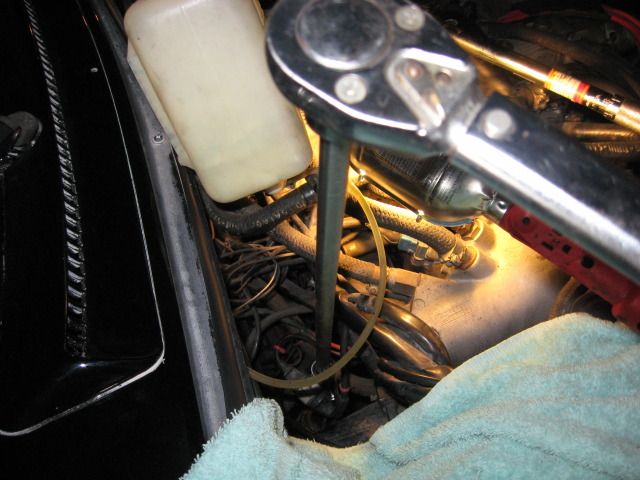
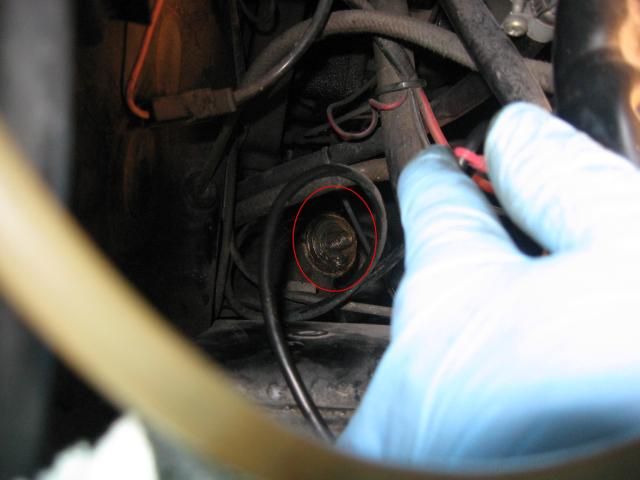
After prying off the spring clip and removing the dust cap the nut is visible. There is a washer that is bent against the nut to keep it from unscrewing. I bent that down with a long screwdriver and a hammer. Then I unscrewed the nut with a long extension and a universal joint
![Image]()
Here the retaining nut is removed:
![Image]()
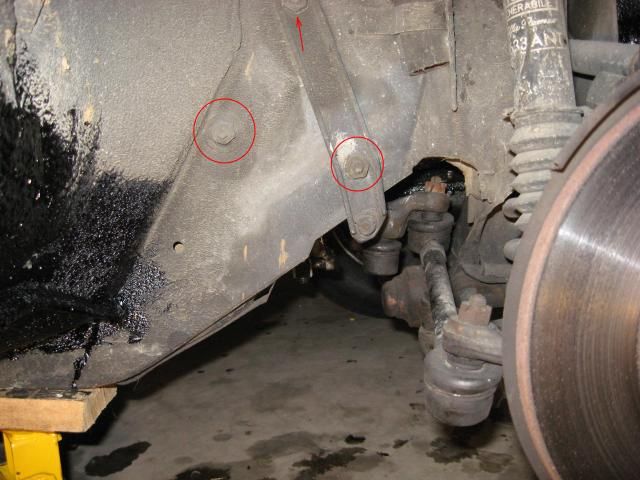
Next step is to remove the retaining nuts
![Image]()
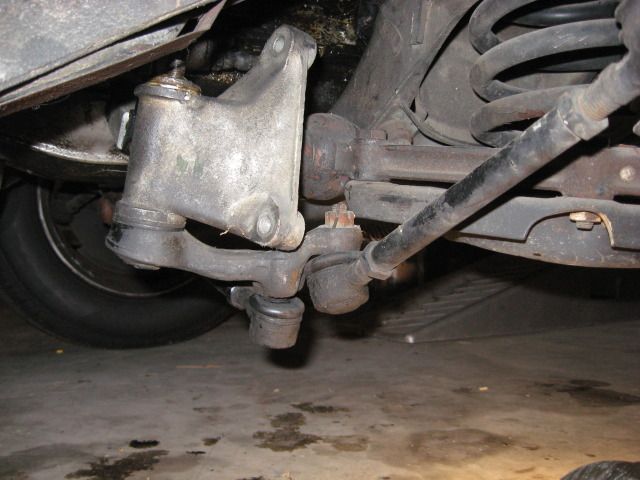
Once the mounting bolts were removed, I was able to lower the bracket like this
![Image]()
A light tap with a hammer is all that was needed to slide the housing up off the idler shaft.
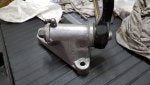
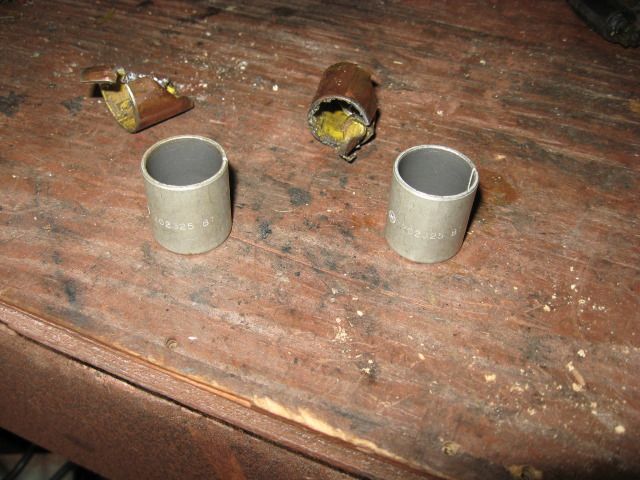
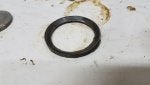
The most difficult part turned out to be removing the old bushings. They were glued in with lock tite and I was unable to simply tap them out with a punch. I ended up using a hacksaw blade to cut thru them (taking care not to damage the aluminum housing) and then punched them out with a chisel. Here are the old bushings and the new bushings
![Image]()
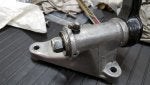
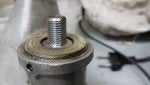
Next I pressed the new bushings in the housing. If you look closely at 3:00 in this picture you can just barely see the grease fitting that I installed (I forgot to take a good picture of that). I drilled a hole & tapped it so that I can lube the bushings in the future
![Image]()
Finally, I found that the only way to bend the lock washer back and install the spring clip over the dust cap is to do so before mounting the housing. Unfortunately I did figure that out until I had already mounted the housing and then had to remove it...
![Image]()
After the final assembly everything is tight and there is no perceptible rocking or looseness in the front wheel anymore.
I did not want to remove the ball joints as instructed by the manual, so I took a gamble and did the job like this:
After removing the windshield fluid bottle the top of the idler arm bracket can be seen. It has a cap and a wire clip that holds the cap in place
After prying off the spring clip and removing the dust cap the nut is visible. There is a washer that is bent against the nut to keep it from unscrewing. I bent that down with a long screwdriver and a hammer. Then I unscrewed the nut with a long extension and a universal joint
Here the retaining nut is removed:
Next step is to remove the retaining nuts
Once the mounting bolts were removed, I was able to lower the bracket like this
A light tap with a hammer is all that was needed to slide the housing up off the idler shaft.
The most difficult part turned out to be removing the old bushings. They were glued in with lock tite and I was unable to simply tap them out with a punch. I ended up using a hacksaw blade to cut thru them (taking care not to damage the aluminum housing) and then punched them out with a chisel. Here are the old bushings and the new bushings
Next I pressed the new bushings in the housing. If you look closely at 3:00 in this picture you can just barely see the grease fitting that I installed (I forgot to take a good picture of that). I drilled a hole & tapped it so that I can lube the bushings in the future
Finally, I found that the only way to bend the lock washer back and install the spring clip over the dust cap is to do so before mounting the housing. Unfortunately I did figure that out until I had already mounted the housing and then had to remove it...

After the final assembly everything is tight and there is no perceptible rocking or looseness in the front wheel anymore.


")