Alfa Romeo Forums banner

Flow numbers for Busso V6 3.0/3.2

4.3K views 16 replies 5 participants last post by  BiTurbo228v2  
#1 ·
Hi everone!
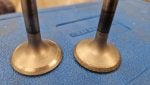
I am interested in flow figures from those of you who have ported your cylinder heads. I feel satisfied with my portings, but as always, one wonders if there is more to be found. Maybe not at maximum lift but at low and medium lift. I know Jim was happy with his 156cfm (10"VP), a 13% increase from what he measured before, but I'm curious about more references. Preferably then with standard valves 35.5mm

Also interested in where in the intake duct you have sanded the most, or the least. Also interested in the corresponding numbers for the exhaust duct.

Regards //Ricky
 

Attachments

#2 ·
The ports on the V6 12V heads have a bulging curve on one side as the ports blends to the "bowl area". reducing the radius of that curve opens the port flow and improves flow.
That and opening the seats with a 75 degree "bowl hog" to increase it`s inside diameter will make an improvement in flow. Widening the ports otherwise will reduce "charge" speed of the Fuel Air mix.

On all my engine builds I use only the 75 degree opening cut to a single 30 or 45 degree seat with with a narrow seat width. With 30 degree angle "valve contact" seats of 1mm on intake and 1.5mm on the exh. With 45 degree angles seat widths (and the 75 degree openings are not as wide) as to leave a 1.5mm intake seat and 2mm exhaust to prevent the heads seat from "spreading" due the the force of the closing valves on the contact area of the head`s seat area with the 45 degree cuts.

On 4 cylinder Nord engines I use oversize intake valves with the seat re-cut from 45 degrees to 30 degrees to get a bigger seat opening.for flow. Same can be done on the V6 heads.
 
#3 ·
The ports on the V6 12V heads have a bulging curve on one side as the ports blends to the "bowl area". reducing the radius of that curve opens the port flow and improves flow.
That and opening the seats with a 75 degree "bowl hog" to increase it`s inside diameter will make an improvement in flow. Widening the ports otherwise will reduce "charge" speed of the Fuel Air mix.

On all my engine builds I use only the 75 degree opening cut to a single 30 or 45 degree seat with with a narrow seat width. With 30 degree angle "valve contact" seats of 1mm on intake and 1.5mm on the exh. With 45 degree angles seat widths (and the 75 degree openings are not as wide) as to leave a 1.5mm intake seat and 2mm exhaust to prevent the heads seat from "spreading" due the the force of the closing valves on the contact area of the head`s seat area with the 45 degree cuts.

On 4 cylinder Nord engines I use oversize intake valves with the seat re-cut from 45 degrees to 30 degrees to get a bigger seat opening.for flow. Same can be done on the V6 heads.
Thanks!
Regards //Ricky
 
#4 ·
Testing further in the flow bench....
Today I tried to flow an exhaust port with the bench.
Works brilliantly. Just turn the pipe 180 degrees and control the exhaust port instead of the intake port in the fan box.


Image


Have also tested to flow an almost original exhaust port. What has been done is that the opening towards the manifold has been opened slightly. But I couldn't bring myself to take a completely untouched port to measure on. But it will be done.

Someone said you should have 85% of the intake flow on the exhaust port. If I take it as a real number, the exhaust ports in these tops flow really really bad....They are at like 58-60% in flow, ie the ratio is pretty bad.

And even at very low lifts, the flow solidifies.
Image


Have also looked for a howling sound in the intake around 6mm in lift and discovered after a bit of searching that I did not file symmetrically on the two intake channels down towards the valve. It didn't produce any appreciable improvement in the flow when the howling went away, but it shows how very little is required to create turbulence in the channel.

Good experience.

Also tested the wedge itself and the fact is that I probably got a little more flow at 2-4mm in lift with modeling around the wedge, but that didn't affect the maximum flow in the channel, as it looks right now.

So it went to the memos, "Let the wedge be".
Image


Regards //Ricky
 
#7 · (Edited)
Some update after tonight's work.

Jim K. came out with a new book some time ago where he wrote about modifications on, among other things, the Busso 24V, and in that book there is a flow chart where he flowed heads at 10" VP.

The work I've done so far on the cylinder heads is spot-on compared to his diagram and that should make me feel satisfied. But I feel, shouldn't there be more?
It might not, when you don't go up in valve size but stay at the standard size.

But I think it's more that I need to experiment more, get a little more experience and learn where the weaknesses are on these tops.
And to maybe ignore the max flow and see where I can find more flow on the way up.

So those of you who know, enlighten me please!

Anyway, I did valve work and porting tonight, and on the exhaust valve I set the cutter to 60 degrees and graduated the valve on the front. I think it might make the exhaust "come around the edge" a little better. Also made a 30 degree up towards the shaft, but I think it does no good. The exhaust will never flow there anyway. But I could be wrong, because I haven't measured before/after.
Likewise, I have made a 75 degreer in the seat, but my 15 degreer did not fit. I'll try to open up more around the valve and hopefully get the tools down.

Also sending some pictures.

mvh //Ricky
Image
Image
Image
Image
Image
Image
 
#9 ·
I am done for now.

The middle wall was 1mm too thin on each side, so even though I have the flow, I also have a whistling sound from 5.5 to about 8mm in lift. A bit annoying, because if I make the wall 1mm thicker, the flow increases for me, and the channel becomes quieter.

But overall, I am very satisfied with the ducts and combustion chamber. Especially the exhaust duct is performing right now, and it is probably possible to get more out of the cylinder head, but for now it will have to be enough, I think.

Max flow on intake is 275cfm and on exhaust 200cfm. Original when I started measuring, intake was 244 cfm and exhaust 171cfm, all measured at 28" VP.

As I said, I'm not sorry if someone makes comments or says that I can take more here or there....

Now everything should only be copied 6 times.....

mvh //Ricky
Image
Image
Image
Image
Image
Image
 
#12 ·
A question.
What is the minimum length recommended for a valve guide so that it can continue to do its job?
On the exhaust side, it's about heat dissipation and on the intake side, centering the valve (in principle).
On the exhaust side, I have ground off the guide as it is over 40mm (42-45mm, can't remember exactly) long, but on the intake side it is 35mm, and if I grind it off, we are talking maybe 31mm in length. Will the stability be too poor if the cam pushes 12.5mm from above?

I agree that the lifespan of the steering is shortened, but how bad will it be?

mvh //Ricky
 
#13 ·
Been thinking about my intake duct for the last week and was a bit tempted to grind the inner radius like a "D", which I read about.
The measurement below the valve down into the pot is 30.8 (valve size 35.5).
Anyway, it didn't turn out well at all.
I lost a lot of CFM all along the curve.

Anyone have any tips on what I did wrong, because I think the intake duct both feels right and looks right...

mvh //Ricky
 

Attachments

#14 ·
Interesting:
Inside radii (in general) should be kept as large as possible. Since you are performing R&D on this head you can (poorly) weld back material and continue.

Also, the clay intake funnel is extremely important and sensitive (this can also be a source of lost performance when comparing). To eliminate (or minimize) the effects of variance from handmade funnels, consider using one made by a 3D printer. The resulting ridges from the 3D printer can be smoothed with the clay.

When flow testing, are you flowing (or vacuuming) into simulated cylinder bore? Regarding the picture you posted in #4, it is hard to make out what you meant.
 
#15 ·
Interesting:
Inside radii (in general) should be kept as large as possible. Since you are performing R&D on this head you can (poorly) weld back material and continue.

Also, the clay intake funnel is extremely important and sensitive (this can also be a source of lost performance when comparing). To eliminate (or minimize) the effects of variance from handmade funnels, consider using one made by a 3D printer. The resulting ridges from the 3D printer can be smoothed with the clay.

When flow testing, are you flowing (or vacuuming) into simulated cylinder bore? Regarding the picture you posted in #4, it is hard to make out what you meant.
Hi,
Yes, I flow into a simulated bore. And clay around the intake is (nearly) the same from test to test and I cannot see that the differences has a huge impact on my readings, if any. But as you mention I think I will go with a 3D-print as its so much cleaner to work with. I have welded the inner radius this evening to see if I can get the gain back.
Hopefully I will regrind and test tomorrow.

Now I know what not to do anyway. :)

Regards //Ricky
 
#17 ·
A little bit of an old thread, but some good info here.

Careful with porting the exhaust port. They don't work in the same way as inlet ports as the dynamics are different (enormous pressure differential on the blowdown of the cylinder as the valve opens). There's some good information about exhaust porting here, partway down the thread with a load of quotes from a chap called Darin Morgan (big in the American V8 scene). Good forum in general for learning about porting.

He talks about it not being a particular problem being down around the 58-60% flow ratio between inlet and exhaust. Way more than the flow numbers, it's the noise an exhaust port makes that's most important (because noise indicates turbulence on a flow bench, and if it's making turbulence at 10" or 28" of water, it's going to be colossally turbulent on blowdown which is not what you want. Ideally, you want a 'silent' port (silent as they get on a flowbench that is). Failing that, a port that gets quieter the higher you lift your valve is promising.

I've come to the conclusion that flow figures are the least important thing a flowbench can tell you (they're still useful, but there's so much more useful stuff they can do). Even on the inlet. If you can get a tumble gauge going (for 4v heads), you can start influencing the combustion efficiency as well as the flow rate. Same with squirting some dye-chem into the inlet ports and seeing where the fuel goes. If you start looking at these, it makes it plain as day why hogging out ports as large as you can get them (which will massively increase raw flow) invariable kills power. Mess with the velocity, you mess with the tumble, which messes with your mixture preparation, which makes a rubbish burn.

Oh, and the whistling sound is probably air shearing off the too-sharp divider wall. If air hits that at any angle other than dead on (which it will), it'll shear the air off the surface and close off your effective cross-section. Not great on a running engine which will be seeing airspeeds much higher than you see on a flowbench (so the shearing will be worse).

From what I understand anyway!