Alfa Romeo Forums banner
21 - 40 of 163 Posts
Discussion starter · #21 ·
So... engine in, wired up and all the little stuff. Started on first spin... really... Then I noticed oil pools forming in two sparkplug wells. New VC gasket, tightened nicely, but still seeping out inside right side. Intake manifold water bleed nut/screw thingy was screwed up, leaking, and a fast idle from deep space that I'll figure out manananana...
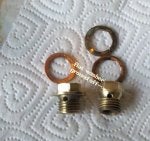
So another reason to keep old or spare parts about. I found a intake manifold I've had for 15 years probably.. in a container in storage.. in the back.. .at the bottom.... in the corner of the stack of containers..and found a replacement bleed screw/nut thingy in great shape, installed and took care of the only leak.
So, as I let it idle for a few minutes to get warm and get the new coolant circulated, I realized how much 'little stuff' we do to these cars. Stuff that others can't possibly know we've cleaned/rebuilt/replaced/polished/rigged/improved/
eliminated/etc/etc/etc...
So.. a small visual tribute to a small area of the engine compartment and what I can remember what I've done so far... what you can see.. :)
A great way to spend a Sunday afternoon...
..and self bled the front rebuilt calipers/brakes using a ski pole (that's all I could find that fit to the seat) to pump up the pedal and hold pressure by the flex of the headrest of the drivers seat. Three pumps per side and brakes are tight..
 

Attachments

Discussion starter · #22 ·
Rear brakes.... pulled both rear calipers after trying to retract all 4 pistons on car with bleeders open. Two retracted 'ok', one retracted slowly, one... is clearly retarded.. :).. Sent off the rotors to get resurfaced, electric wire brushed most small parts, tapped and died wheel studs and lugs that were tired. Brake shoes are actually in good shape like the fronts, so cleaned up the surfaces for reinstall.
Had invaluable help with the bleeding process and now... to help loosen the caliper pistons as much as possible on car. One side at a time, with the other side 'restrained' with a 'spacer' that kept the pistons at bay. Large channel locks allowed me to compress the pistons after we pumped the pedal to push them out, clean the piston and do it over again.. and again.. and again. The right rear loosened up very nice. Left side... outer piston came around after a few rounds.. but the inner piston... like the middle child... just stayed where it was. maybe a 1/8 inch 'travel'. Better than nothing, but not much to work with. Able to get penetrating oil on the piston exposed, compressed the piston back with a careful vise and one last pedal push to get it out as far as it can for now.. I reassembled the right side with wheel on, caliper bled, shoes in. I'll assemble the left side with everything besides the inside shoe, maybe heat up the caliper/piston area for a bit to break loose anything that might feel inclined to break loose and try to pop it out with pedal pressure again. Ultimately will put new rubber on both rears like the fronts, but not in the mood to use grease or C-4 explosives yet...
So... assembled the shift tower area inside ****pit..Filled the transmission with oil from the top, .new inner and outer rubbers, cleaned up and slightly cut the opening of the thick rubber collar and it's metal top. All buttoned up and hopefully oil free for a few years.. ).. I'll be laying Dynamat on the floors and firewall later.
Stopped oil leak on the valve cover. The inner surface of the cover is slightly 'warped'. Got a .020 feeler thru with straight edge. So some blue stuff on that area, let it set, tightened valve cover just past snug and let it sit for a few hours before I started it.. Voila... no leak..
Back in a few days to finish the brakes.. the emergency brakes are in great shape now.. cleaned gunk out, anti seized surface points, adjusters work, eliminated any possible rust/sticky points for future rotor removal.
 

Attachments

Discussion starter · #23 ·
brakes finished...

What a difference a day makes... or maybe it was the country western radio station I tried out today.... :)
Re-assembled the left rear brake area, bled out the lines one more time and removed the inner left rear pad. 10 pumps of the pedal and the stuck piston, came out of his closet to expose the gunk holding it back. That allowed me to pull the caliper off, pop the piston all the way out and clean out the cave, new seals on both piston holes, cleaned and reassembled.. one last time... and the brakes work much gooder now.. :).
So..., lets review.... All four rotors turned, old pads cleaned up and re-used, bearings packed, all 4 calipers with new rubber seals and boots. Any hurt threads cleaned up, emergency brake linings/mechanicals cleaned up, (now works great), anti-seize added where needed, tires on and reliable brakes done....
Ran the engine for 30 minutes with a spin around the south of Santa Fe to test brakes, remembered the front bumper wasn't bolted on... oops.. but luckily it stayed put. Engine temp and oil pressure good, the transmission shifts great, and quiet now with the new rubber to insulate the sound,even without dynamat and carpet installed.
 

Attachments

Hope they played some Buck Owens! Good to hear that the brake piston finally came out!
 
Discussion starter · #25 ·
Steering wheel and interior... the wheel has, from years of sitting outside in high altitude dry sun, got issues. Three cracks, the worst one in pic below. From the other threads on this, I've scraped the old finish off with a old but sharp triangle scraper, a little sandpaper and a fine rat tail round file. A majority of the finish came off with the scraper, with the steering wheel still in car. With the steering wheel wheel locked, very easy and almost relaxing to sit and scrape. Bare metal floorboards for now so a power vac cleaned up my mess easily. The round tail file gently on the backside of the wheel were the 'finger' grooves are, and sandpaper used carefully around the spokes and such. Now that its roughed out, I'll have to dig thru boxes and my long term memory files to remember where I put the steering wheel puller to do the finish work. Sometimes I spend more time and questioning my sanity looking for tools....
The threads on this have lots of options for new finish. And some mention of stain. I didn't think this wood would need a stain? Will it be too light without?. I don't want the darker finish on it, but don't want it looking like Pine either.
I'll see if there is this 'Interlux Schooner Varnish' in NM. We don't have a lot of Schooners here in the desert.. :)
And.. starting to sort thru 4 bags of assorted screws, nuts, bolts that aren't marked, most look like interior related pieces. the interior is basically bare for now. Door panels are on temporary, and the seats in to sit on. I've 'rebuilt' the console and got the wiring all sorted out, ready to assemble when the rest of the interior is put together.The wiring under dash is in good shape overall. Fuse box needs cleaned and contacts cleaned, correct fuses put in, and a few owner added wires that go nowhere traced...
 

Attachments

Discussion starter · #26 ·
Had a few hours in the middle of the day...
I've had a set of springs, front and rear from IAP for over a year sitting on my parts shelf. Not sure which Spider to put them on.. but it looks like the 77 will be on the road first.. So.. here's the original springs from rear.. and new IAP Red springs going in. Pic is of the car after JUST the rears have been changed. Didn't do anything with spacers or rubber. Actually a quick job, no rust issues at all, clean and intact parts. For now... going with the original shocks which were dry and gave some resistance when re-installing. Anti-seize on cleaned bolts and bolted right back up. Ride height dropped 2 inches total on the rear. 24 inches at wheel well top.... 26 on the front.. for now... Front springs maybe later this week.
 

Attachments

Cool! Let me know if you need an assistant!
 
Discussion starter · #28 ·
M/c

of course the master cylinder is toast.....
it looked like toast, felt like toast, (the brake pedal wasn't quite firm), and it took a bit too much pumping to get all the bubbles out of the lines...
So got the old one off. The booster was filled with dark, ugly brake fluid. Close to 2 cups. I'd be blowing whiteish smoke out the tailpipe soon...
New M/C is here, sucked the booster out and cleaned out residue. Popped off the plastic reservoir and cleaned. The outside of the booster is a mess, I'll sand and paint tomorrow, prime the M/C and install, bleed brakes 'un mas tiempo' and hope for nice firm 'completely done brake system.
 

Attachments

Discussion starter · #29 · (Edited)
--Master cylinder in.... bench primed and intial bleeding with my ski pole method. Without going to the wheels.. (no help today)... and I've got 'decent' pedal..
--I found myself staring at the car.... not sure what to 'attack'.. so cleaned two work benches that need cleaned up.. wrenches/screwdrivers/drills/punches put away, boxes and rags thrown, fluid's back on the shelf. Kind of like going around a game board and starting over. The shop ready for the next job.
--And, staring at the car, now that the rear end looks remarkably lower.. (but only 2 inches)... it seemed right to prep the front spring area for dismantling... Got the front sway bar off. Cut new 7 inch 'all thread' sections for the Spring pan removal. Probably my age and some PTSD from the last time I did coil replacement, but I want the 'all thread' to be new and threads not stretched at all for the slow release of the coils. ( I lost one inch of my right index finger on a slipping jack when I did the rear springs on my 69 GTV).
--Secured the airhorns to the old left side horn mount and got the wiring sorted out for that. Looks clean and out of the way. Air compressor pump fits right where the old air pump filter was.
--Decided to leave the maroon colored vinyl seats alone for now. Was going to SEM spray them to a saddle brown. Besides being 'maroon', they are in ok shape for now. Function before beauty.....The 79 Spider needs reupholstered more...
 

Attachments

It's looking good!
 
Discussion starter · #31 ·
frt springs

Pulled down the right side spring area, sway bar out, 7 inch all thread on all four pan corners, lowered equally, old spring out. Everything is in good shape overall, mostly dirt in the pan, cleaned up bolts and spacers and such. Figured out the thicker/shorter springs not fitting onto the inner lip of the metal 'shim above the rubbers. I have spare extra pre-powdercoated pans ready to go in. So... with cut inner edges on the shim, coil fit is good, plastic ties to hold the top end together for assembly, used a jack just to bring the spring up into the housing, secured with all-thread. I found that the distance to tighten is much less than removal. Install was much less stressful than the last time, no fear of losing my forehead to a launched coil spring... but careful. Lowered the car to check the height. I left the alum spacer in and both upper and lower rubbers with the new spring. I don't want it too low, just better. Measured spring height with car on the ground is great. Left side this weekend I hope...
 

Attachments

Discussion starter · #32 ·
ok.. left side this afternoon...
Left side went swifter. 1/2 inch difference between sides. Put my 195/60's on the front to see what that looks like too. Makes the rear 70 series look like cartoon tires and more 'stuffed' in.. Went out and hit some bumps to settle the springs in. No sqeaks or rattles. Shocks next. And got a gas smell/leak on this test drive, a small pool of gas at the top of the gas tank sitting in with all the gas tank electrical wires.. lit a match so I could see better and.... kidding... Im kidding.
 

Attachments

Lit a match....... too funny! Back in the Seventies, I worked at a privately owned gas station owned by a successful if not to bright individual. He told us pump jockeys a story about how when he was younger working at his father's gas station in the Twenties of a car that came in at night overheating. As he peered into the radiator with his dad, one of them lit a match to see if there was any coolant. Back then apparently a lot of car owners used alcohol as an anti-freeze, so a lit match, some vapors, and a flash fire, which singed the eyebrows off of both of them!
 
Discussion starter · #34 ·
the other Spider....

Instead of a new thread... I'll blend the two cars here.
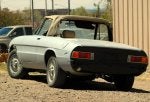
I have a 79 Spider also, barn find in 09 (?), got it running and 'cleaned' up. Then off to and now languishing at a body shop over the past year, (which was fine for the most part, free storage and start/stop progress, plenty to do on the 77 and watching $$).
My girlfriend Robin had her CRV in the body shop, was borrowing my Toyota and managed to back into.. 'the Alfa' over a year ago.. bloodied the nose of the Alfa and off it went to my body guy, whenever he could get to it. We appear to be on the home stretch for finished body work and then paint. I've helped here and there, but put more 'alfa-time' into the 77 and the GTV this winter and last summer.
So.. pictures... Left side ready for blocking, front end the same, rear end is basically ok, right side had a ton of bondo and the holes to pull the door out waiting underneath.We did both 'behind the wheel/lower front fender rust spots with new metal and a fine coat of filler. He'll do the door and right side by next week and then we talk paint and bringing the car home.. finally.
Between the 77 and the 79, each car is in a parallel universe. A majority of the mechanicals on the 77 are done or close. The 79 body will be done and purty soon. The body on the 77 is basically straight, Im sure small dings and waves to smooth out, and one 'fist-dent' or something on the back right rear.
The 79... runs ok, a few new parts, but will need the fuel system rehab, from cleaning out the gas tank, in-tank pump check, to Spica adjustments to get it running 'reliably'. Then go thru the same mechanicals as the 77, but I'm leaving the suspension stock for now. I'll have one with the firm ride and the other for stock ride. Should be an interesting comparison.
So... hopefully paint the 79 in the next few weeks and get it home, put back trim and such and the hope is to drive it some thru the summer, and a bit of driving the 77 too. I'll just leave the 77 in primer for now, have fun with dialing in the mechanical work from this winter, stay within AAA towing range...
And.. my two GTV's are prepped and staring at me, ready for a longer road trip... guilt trips from cars....maybe Utah... or Boulder... south NM...something..
 

Attachments

Discussion starter · #35 ·
it's been awhile.. perfect weather and trying to get one of the Spiders on the road in the next month. Sneaking in time between work and clients and the end of the world last week.
Sometimes it's the small stuff... Getting the headlights prepped for relays. Took both headlight buckets out, cleaned electrical tips, grounds, various nuts and bolts and attachment spots. Buffed the trim rings inner and outer. Buffed the headlights too. I'm debating whether to go with 10gauge wire to the headlights. The 'harness' to both is in good shape, I'm not upgrading to H4's yet. And mostly driving this in the daytime. So I'll go with the relays to help the light switch for now and thats plenty.
Side markers.. same idea. If I'm sticking to my plan of not throwing a lot of extra time, money and labor at a 'daily driver' car, I'll pass on the Mig welding of the marker holes and have instead refurbished the two front marker assemblies. Again, R&R both, carefully taking off the nuts, cleaning the threads to reuse. Buffed out the chrome, washed out the socket areas, used sanding cones in a drill to clean up the light sockets for good contact.... and back together on the car. If normal people knew how much time I spent making the front lights 'mo better'.....But another fun 2 hours in the middle of the day.
The high beam doesn't work, so removed the light switch and I'll go thru it, clean contacts and electric lub the assembly. It's still pretty tight, ( I'm guessing the PO, like most people in NM, never used the turn signals). And not unless there's a major issue, I can re-use the switch. a couple of great threads on here about cleaning the points, cleaning out the unit and back together. I've re-done 2 switch assemblies before for my GTV's.
The black 79 is almost ready for paint. Going with Daytona Blue, not as hot on the arm, and as much as I know they look great black, or red, or green, or white.. and sometimes blue :), this will be a color I'll like down the road. I've got a bunch of mechanical parts waiting for the paint job to be done, some engine, tranny mounts, exhaust, and a little brake work... for this season.
 
Discussion starter · #36 ·
Update time... Dash rebuild. Removed both pods, cleaned and treated the vinyl and metal, repainted black. Cleaned all wiring ends, changed out three connectors that might be an issue with grounds or a good connection for dash lights. Polished speedo and tach faces, checked for smooth spinning of both. Old tach cable was twisted up in there and needed replaced.
Gauges all were pulled out, console cleaned and painted. All warning lights buffed and replaced. New and slightly brighter bulbs put in, wiring cleaned, two new ground connections. Buffed the gauge housings. Looks purty..
Steering wheel off, used a puller and with a little effort, popped off. Finished scraping, sanding to 1000 grit, glued 4 mild sections that had mild cracking, finished sanding and 5 coats of Spar, buffed between. Wheel spokes buffed, horn contact and spring R&R'ed and cleaned.
Turn signal assembly R&R'ed. contact points all filed lightly, old electric grease and dirt removed and electric grease on contact areas. TS arms cleaned and clear painted, new spring(s) for the actuator movement. Steering column covers cleaned and painted, two new proper bolts to hold it all together.
Dash wiring rerouted and modified to deal with the headlight relays and starter relay system. Also got rid of any seat belt buzzer crap and other wires that will never see current again.. )
I've ordered some faux dynomat from Eastwood, and I'll insulate the floors in a while. Parting out a 74 Spider with some of the rubber mats in B+ shape, cleaned up.. they'll look fine and a bit worn.. which I like... I'll probably mix the rubber mats with carpet and cocoa mats later on too. but the dash work is mostly done now.
Dash console top is done also. Black silicon on both side edges to shore up the sides and get them fairly even from top to bottom. ashtray restored, tiny little 3 mm bolts, buffed, vinyl treated.. switches all work, and reassemble the console later on...
Got self-bleeder thangs for the brakes and will do the bleeding process one more time to get a bit more pedal.. if that don't cut it.. pressure bleed..
Car starts right up, very happy, good chance of having it on the road and presentable (ish) in less than a month. Evening time mostly for working on it. Drove the 74 GTV to Pagosa Springs a few weeks ago, (320 RT) longest drive since the re-do, ran great, next trip to Denver...or wait till Fall and try the PCH again.
 

Attachments

Discussion starter · #39 ·
The fires missed my house by 1 mile....good reason to put in the halogens and relays... Even with the primer coat.. looks purty good.. Two new relays on left front engine compartment. Alt power to relays, 12 gauge wire from relays out to lights. cleaned and shortened the wires to each bucket. Cleaned all grounds.
I went thru the turn signal switch pretty well, cleaned points, old grime, etc, but the headlight switch must need something else. The lights come on very nicely, but only with the switch stalk held back towards me a bit. some play on the stalk?, or wear, or something I missed.. I'll pull it back out.. any suggestions...as always... welcomed.. It does it with both high and lows.. you can hear the relays click in and out while pulling gently back on the stalk... it's in the switch somehow..
Rear tail lights both taken out, buffed, reflective material cleaned up, new bulbs, dressed the rubber seals, and a few new 'rope' seals for the lenses'. .back in for now.. A bit brighter and cleaner.. Any grounds within reach were unscrewed and cleaned and retightened...
The heat and fires have been a bit much... but still trying to get 3-8 hours on the car a week.. even if its little stuff.. cheaper than psychotherapy.. )
 

Attachments

Real Therapy

The heat and fires have been a bit much... but still trying to get 3-8 hours on the car a week.. even if its little stuff.. cheaper than psychotherapy.. )
That's what the VFR is for...:D I had a 94 before the Strom (the knees couldn't take it anymore; maybe after the metal one's get fitted)...When do you have the time???:confused:
 
21 - 40 of 163 Posts